Visiters Welcomed
Wednesday, November 20, 2013
Creating and changing the .exe Icon
Like all things done on the computer there are multiple ways to accomplish a task.
You can use various software freely available from the net to accomplish the creation and loading of icon images.
I have listed a few options below so lets get started:
Software Option #1
- XN Resource Editor
- - Not largely documented but seems to be widely used by other users on the net including many forums.
- - Created by Colin Wilson
Software Option #2
- Resource Hacker
- - An older program than the formerly stated but is thus more widely documented.
Software Option #3
- IcoFx v.1.6.4
- - v.1.6.4 is free but if you download any of their newer versions it's only free for 30 days.
Software Option #4
You can also create icon files using Adobe Photoshop by downloading the .ico save file type. If I am just replacing one specific file like the chili framework uses I will use Photoshop.
If you wish to not download any of the software options one can also use the online upload ICO converter - IcoConverter
My favorite software of the bunch is IcoFx. Developed as an icon editor it is by far the most polished compared to the other two above. There is a resource editor built into this software as well.
So without any further ado I am going to walk you through the process of how I create, alter, and save icon files to be held in the resource file.
1. I start out by saving the original resource file found in the Assets folder. It's the file that ends with ( .res ). I save the original in a new folder in Assets called "OriginalResourceFile". You can name it whatever you like. This serves as a backup in case something fouls up during the changes we are going to make.
2. Renaming the resource file:
It can be renamed from inside Visual Studio by right clicking the file name in the solution explorer and choosing rename or double left clicking on the name will accomplish the same.
3. Saving multiple image sizes in one icon file using IcoFx:
- File -> Import Image: navigate to your image file you wish to replace chili's image with.
- - CLICK "Open".
- - Then CLICK on the windows symbol in the tool bar, a popup window will appear for you to choose the sizes of images saved inside the icon file.
- - Choose the sizes you wish and CLICK "OK".
- - File -> Save As: navigate to where you wish to save your file, name the file and CLICK "Save".
4. Now that we have our file to upload open Resource Hacker or like software.
- File -> Open: Navigate to the resource file we renamed earlier and select "Open".
- If the file is not showing up make sure under Files Of Type: Resource(.res) is selected.
- On the left there is a tree of folders. Two root files named Icon and Icon Group.
- Clicking the "+" symbol next to the Icon Group folder. You should now see two sub folders name 101 and 103. 101 holds the 16x16 icon and 103 holds the 32x32 icon.
- Click the "+" next to each folder to see these files.
- Select the "0" next to the gear symbol in the 101 folder.
- Select "Action" -> replace Icon: CLICK "Open File With New Icon..." Navigate to the .ico file we created in the earlier steps.
- CLICK "Replace"
Follow the same procedure for the 103 file.
Congratulations! Back on Visual Studio Re-Compile your program ( Ctrl+F5 ) and you're done!
Advanced:
Sometimes having a taskbar icon of 32x32 on larger monitors looks a little pixelated. So for those of you that are still with me we are going to add 48x48 size support to the chili framework.
1. We need to create a 48x48 version of our icon and I'm going to assume since you got this far you can figure that out as described above.
2. Lets add some code. Open VS ( Visual Studio ) Resource.h:
#ifndef IDC_STATIC
#define IDC_STATIC (-1)
#endif
#define IDI_APPICON16 101 // 16x16
#define IDI_APPICON32 103 // 32x32
// Add the following
#define IDI_APPICON48 105 // 48x48
3. Now lets change some code. Windows.cpp:
int WINAPI wWinMain( HINSTANCE hInst, HINSTANCE, LPWSTR, INT )
{
WNDCLASSEX wc = { sizeof( WNDCLASSEX ),
CS_CLASSDC, MsgProc,
0,
0,
GetModuleHandle( NULL ),
NULL,
NULL,
NULL,
NULL,
L"Chili DirectX Framework Window",
NULL
};
wc.hIconSm = (HICON)LoadImage( hInst,
MAKEINTRESOURCE( IDI_APPICON16 ),
IMAGE_ICON,
16,
16,
0
);
// Commented the next line out
//wc.hIcon = (HICON)LoadImage( hInst,
MAKEINTRESOURCE( IDI_APPICON32 ),
IMAGE_ICON,
32,
32,
0
);
// Replacing it with the next line
wc.hIcon = (HICON)LoadImage( hInst,
MAKEINTRESOURCE( IDI_APPICON48 ),
IMAGE_ICON,
48,
48,
0
);
Sunday, April 29, 2012
Five Story Brainstorming Topics
Lets start with...
Now flesh out the scene around the purposed situation by answering the other four topics.
Character: Is it a male or female dressed in armor? Are they fighting heroically or cowering behind a rock afraid to attack? What body style or weight do they possess? Is that weight affecting how they are fighting?
Our situation gave us two characters so we can't forget to ask the important character questions about the dragon.
What color is the dragon? Can it fly or is it injured? Does your dragon breathe fire?
Setting: On the sharp shale rocks of a distant mountain top overlooking a small village smoldering from a recent fire. Burnt from the dragon? Could be. Maybe the knight burned the village in order to lure the dragon out of hiding by the smell of burnt flesh. With one decision a little imagination turned our dragon slaying hero into a hellbent villain willing to sacrifice anyone. Setting can also include time as well as place. Is it a knight fighting a dragon in space because the moon was knocked out of orbit by a man made explosion sending it hurtling toward the sun and due to the increased temperatures it cracks open sending forth a mass of baby dragons headed for earth. (Possible Armageddon 5 plot, just wait you'll see.)
Thursday, June 16, 2011
Wrapping up a week long project, "How I attack a photo assignment"
Involving the creation of 60 dvd's to distribute to each graduate of the 2011 LMC RN program. The dvd's contained 150+ pictures of the graduation event consisting of the pinning ceremony with the graduates and their families.
Preparation for Event:
Charging batteries for camera and flash
Cleaning both lenses
Checking camera sensor for dust
Format memory cards
Equipment List:
Canon 5dmrk2 (main)
-Battery (x2)
Canon 30d (Backup)
-Battery
External Flash 580 exII
Canon 70-300is (DO Glass)
Canon 16-35 (L-Series)
8GB CF Memory Card (x4)
Rechargeable AA Battery (x4)
Backup AA Battery (x4)
Microfiber cleaning cloth
Lens Cleaning Solution
Once On Location: Try to get in to see the lighting situation as early as possible. Check ISO sensitivity settings. Determine a good shutter speed so your subject in the location light doesn't become blurry. In this case the location was a local theater with stage lighting. Ask around and find out what lighting changes the producers are planning, choreography, etc. Like a good athlete picture the event in your mind and try and think of how to overcome any problems you foresee. Scan the location and try a few different shooting positions. Even though you may think one place is best for the shoot. Try more than one for the likely possibility that your subjects may do something spontaneous and unpredictable with which you as the photographer must adapt to those unforeseen changes. Remember your goal is to execute your clients dream or idea. Countless times I’ve been on a job and stumble onto a unique and individual way to photograph something. You are hopefully being paid for your individual eye but first and foremost you’re delivering what the client is expecting to see in the finished results. It’s ok and often a great moment when you deliver the product they expect along with a few results from out of the box thinking. Surprise your client as long as you’ve delivered what they asked for. After all you’re an artist and that’s what makes each job fun.
As always a few shots and there settings for you to ponder.
Camera: Canon EOS 5D Mark II
Aperture: f/2.8
Shutter: 1/40
Lens: Canon EF 16-35mm @ 16mm
ISO: 500
Date Taken: May.26.2011
Camera: Canon EOS 5D Mark II
Aperture: f/2.8
Shutter: 1/40
Lens: Canon EF 16-35mm @ 19mm
ISO: 500
Date Taken: May.26.2011
Upon comparing the specs of each image it is not hard to see they are almost identical, save the lens zoom reposition and yet the images are vastly different in subject matter relationship to the viewer and lighting. The technique employed in achieving this difference is that of birds eye view and alternately worms eye view. Neither photo is rendered at the usual human perspective of 5-6 feet off the ground. Implying a perspective unlike our own leaving the viewer slightly unfamiliar with how the object appears but the brain is still able to determine what the object is. Good shooting.
Thursday, August 26, 2010
Some Photoshop Lovin'!
Learn the Nuts and Bolts of photo manipulation from yours truly. The following is the first of three videos going over key features and best practices. This is the Basics tutorial and wont go into heavy manipulation just yet.
It's perfect if you've just cracked open the program and your wondering "where to begin". Hope you learn something you didn't know already and remember there are a million ways to do the same thing and no one way is right. The only right way is the way to get the job done. Good luck Manipulators.
Photo Manipulation Basics ~ LogankeitH from LogankeitH on Vimeo.
Thursday, August 27, 2009
Bird of a Diffrent Color...
PHOTO TIP of the post is: You'll get a better and prettier blur out of your lens by zooming in to your subject from a few feet away rather than putting your subject a few inches from your lens. Shooting with a large aperture like f/2.8-5.6 doesn't hurt either.
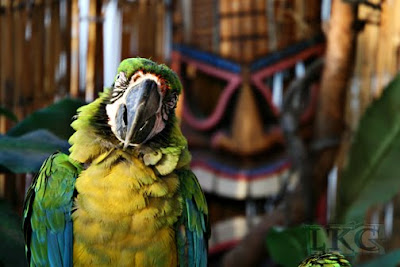
Camera: Canon EOS 30D
Aperture: f/5.6
Shutter: 1/125
Lens: Canon EF 70-300mm 3.5-5.6 @ 300mm
ISO: 400
Date Taken: June.02.2007
Wednesday, July 22, 2009
A Passing of Knowledge
Our plan was to start at the embarcadero and trek our way south along the waterfront towards the giants baseball stadium. A route chosen by the new member of the group, Berette and partly because we had not gone that way in some time.
We got a little exercise, passed on information to an enthusiastic new photographer and each got a rosier complexion thanks to one of the clearest days I've seen in that part of the bay.
PHOTO TIP of the post is: Your next shot might be a few feet away, the next side street up. EXPLORE and you'll find the shot screams out at you. (Take Me!)
Below are some of those moments.
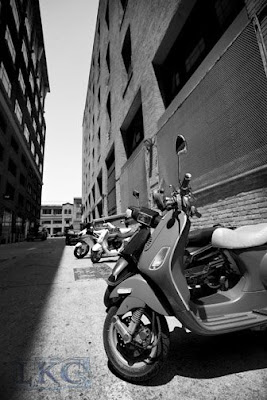 Camera: Canon EOS 5D Mark II
Aperture: f/4.5
Shutter: 1/500
Lens: Canon EF 16-35mm 2.8 @ 16mm
ISO: 100
Date Taken: July.14.2009
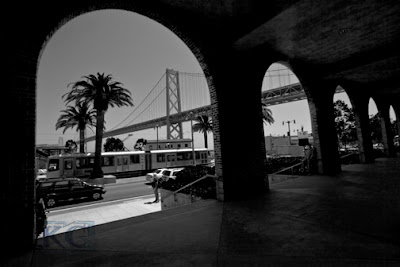 Camera: Canon EOS 5D Mark II
Aperture: f/22
Shutter: 1/30
Lens: Canon EF 16-35mm 2.8 @ 18mm
ISO: 100
Date Taken: July.14.2009
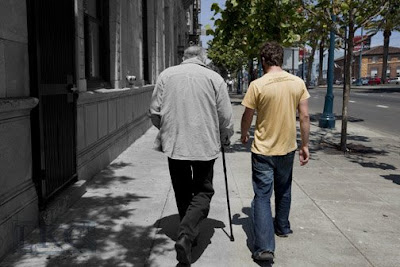 Camera: Canon EOS 5D Mark II
Aperture: f/11
Shutter: 1/200
Lens: Canon EF 16-35mm 2.8 @ 30mm
ISO: 100
Date Taken: July.14.2009
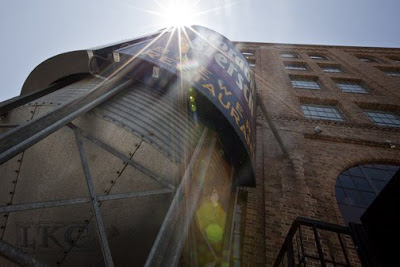 Camera: Canon EOS 5D Mark II
Aperture: f/22
Shutter: 1/30
Lens: Canon EF 16-35mm 2.8 @ 18mm
ISO: 100
Date Taken: July.14.2009
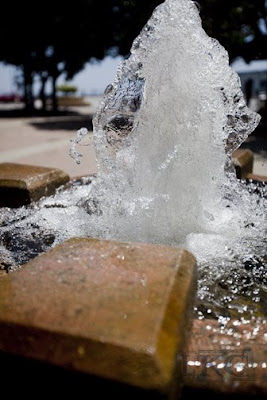 Camera: Canon EOS 5D Mark II
Aperture: f/2.8
Shutter: 1/4000
Lens: Canon EF 16-35mm 2.8 @ 35mm
ISO: 100
Date Taken: July.14.2009
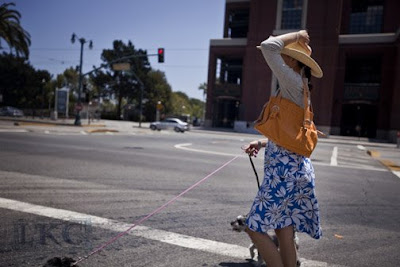 Camera: Canon EOS 5D Mark II
Aperture: f/2.8
Shutter: 1/2500
Lens: Canon EF 16-35mm 2.8 @ 35mm
ISO: 100
Date Taken: July.14.2009
Monday, February 2, 2009
Drop Dead And See Me Some Time!
The things a mind will do at two in the morning, when you're waiting for a friend to drive up from southern California. At first I was disappointed that the glass container was in the shot but I soon realized it divides the shot up, giving it a rule of thirds feel.

Camera: Canon 30D
Aperture: f/11
Shutter: 1/250
Lens: Canon EF 70-300mm 4.5 @ 300mm
ISO: 100
Date Taken: Jan.12.2009


